No products in the basket.
When using Ableton Live to perform your music to a crowd or even just at home in your studio,
It’s critical that you’re able to launch clips in time with the rest of your track.
There’s nothing worse than when a mistimed loop suddenly clangs out of the speakers and ruins your flow.
So we have put this complete guide of all the possible reasons why your clips may not be launching in time and the steps you need to take in order to fix it.
So read on to get your Ableton Live clips launching in time!
In this article:
- What are clips in Ableton Live?
- How to trigger a clip
- Reasons Why Clips May Not Launch In Time (overview)
- Set ‘Global Launch Quantization’ Correctly
- Set ‘Clip Launch Quantization’ Correctly
- Set The Clip’s Start Point To A Downbeat
- Set The Arrangement Loop To A Whole Number
- The Scrub Tool Has No Launch Quantization!
- Final Thoughts…
What Are Clips In Ableton Live
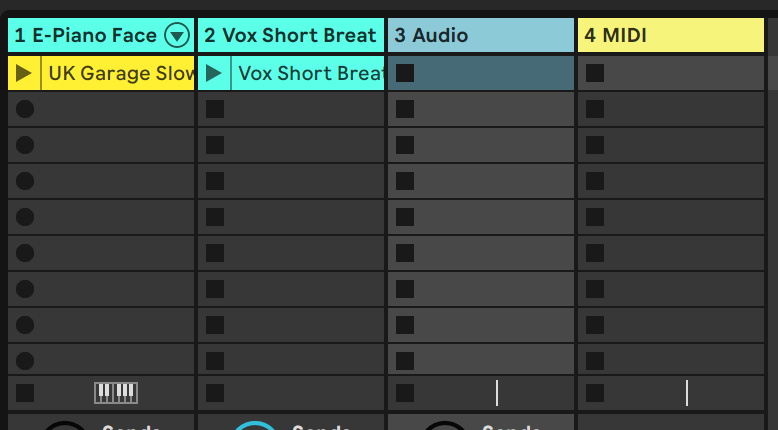
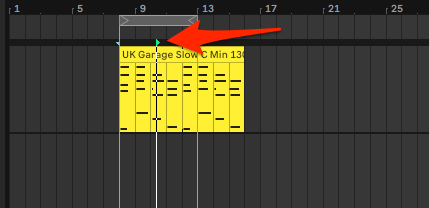
Ableton Live’s clips are the backbone of the Session View,
each clip contains either an Audio File or MIDI Data and will playback its contents when you click the clip’s own play button.
The ability to easily play back a selection of clips together, with all of your clips perfectly in sync, is what makes Ableton Live great for quickly sketching out ideas for your track.
Being able to chop and change your playing clips is a great way to come up with new ideas for your music. .
How To Trigger A Clip

For each Track in the Session View, you’ll see a grid of Clip Slots. Each Clip Slot can contain 1 Clip which you add by dragging and dropping an Audio File or MIDI File on to from the Browser.
Once you have a Clip in a Clip Slot, the slot will change to a color and the name of the File will be displayed.
To the left side of the clip you’ll now see a ‘play’ button.
Clicking the play button should immediately start playback of the file.
However, it’s important to note that clips are subject to various rules which can cause it to not launch at the right time and cause the clip to not be in sync with other audio contained in your session.
Reasons Why Clips May Not Launch In Time
Ableton clips may not launch in time due to a few different reasons: the global quantization setting, the clip quantization setting, the clip start/end marker, the clip’s warp settings, the loop settings or the Scrub Tool.
Below I’ll explain each problem and the appropriate steps to take in order to fix it.
Set ‘Global Launch Quantization’ Correctly
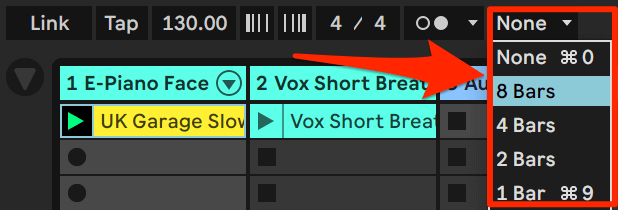
The ‘Global Quantization’ setting is what controls the launch time of all clips by default in your Session.
This setting can be found in the top menu and contains quantization options ranging from ‘None’ to ‘1/32’
The main reason that this causes clips to not launch in time is when it is set to ‘None’,
as this means that your clips are not constrained to a quantization so can literally launch at the exact time you click its play button.
Try setting Global Quantization to something other than ‘None’, 1/4 or 1 bar are good options, then see if this fixes your problem.
If not, continue reading…
Set Clip Launch Quantization Correctly
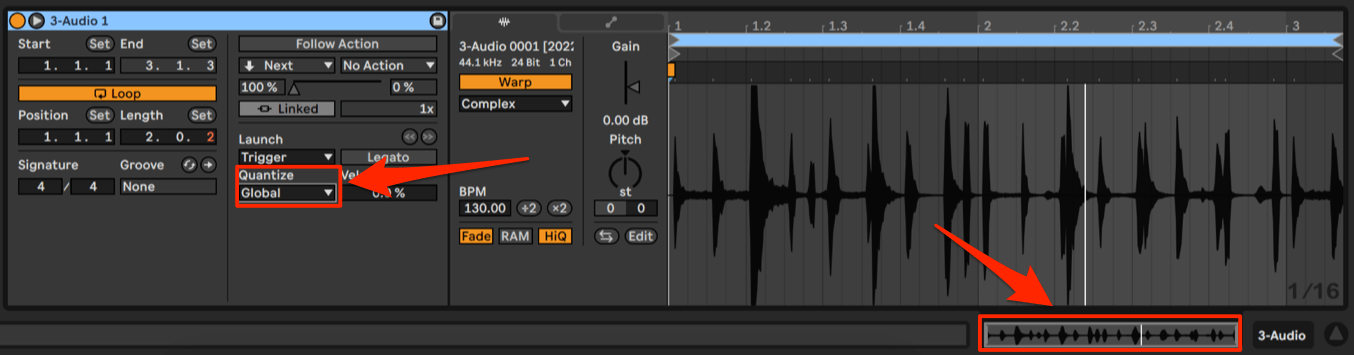
Each clip can override the Global Quantization setting with its own individual Launch Quantization.
This is set by doing the following:
- Select the clip,
- At the bottom right of the screen, click the ‘Clip Overview’ Tab, this will display all options for the clip
- Click the ‘show/hide Launch Box’ icon which is a small L icon. This will display the clip ‘Launch’ options
- You should see a ‘Quantization’ section containing a menu with options including ‘Global’ and ‘None’ to ‘1/32’.
Setting the clip’s Launch Quantization setting to something other than ‘Global’ will override what is set in the ‘Global Quantization menu’, but only for this clip.
Try setting this to something other than ‘Global’ or ‘None’ and see if this fixes your problem.
If this still doesn’t fix it for you, continue on to the next reason…
Set The Clip’s Start Point To A Downbeat
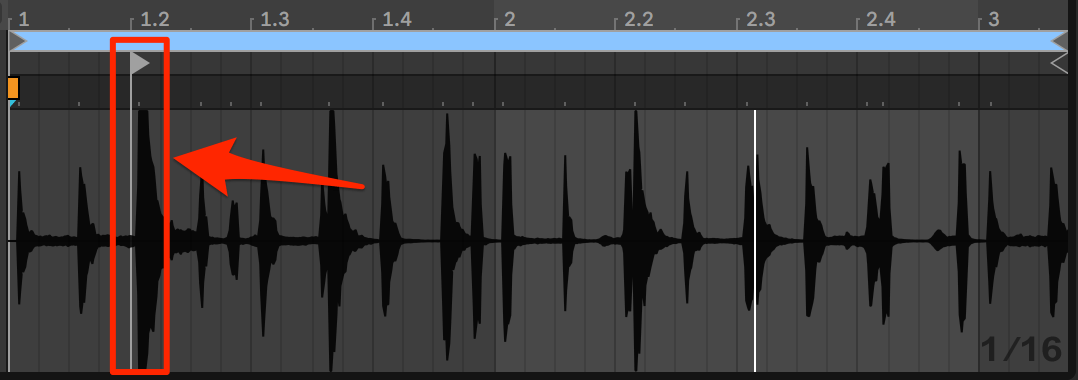
When you click a clip’s play button, the point at which it begins playing back at is set using a ‘start marker’.
If the marker is set offbeat or just at an unexpected downbeat, then it will make the audio sound out of time with the rest of your track – even if it is actually launching at the correct time.
Note: If you have background noise in your audio, it will show in the visual waveform, if quite loud, this can obscure where the down beats are.
To set the Clip’s start marker:
- Click on the clip
- At the bottom right of the screen, click the ‘Clip Overview’ Tab, you will see a visual waveform of the clip
- Find the start marker by scrolling left/right in the waveform. The start marker look like a triangular grey flag
- Move the marker to the beginning of the waveform or a suitable ‘downbeat’ so that it launches in time with the rest of the track.
A good way to test the clip’s start point is by playing both the clip and track together, then moving the start marker until the clip sounds right to you.
Note: If the clip launches in time but then goes out of time over the course of its playback, this may be due to the warping of the clip,
or if you have looping turned on for it, the loop length is not set to a whole number.
Set The Arrangement Loop To A Whole Number

As well as looping for individual clips, The Arrangement View can also be looped.
If you have the Arrangement Loop turned on and it isn’t set to a whole number,
this can make clips sound like they’re not launching in time with it.
To set the length of the Arrangement loop, in the top menu of Ableton Live,
look for the 3 squares at the right of the central section of tools (to the right of the ‘Punch Out’ switch).
To loop the Arrangement only in full bars, make sure that the second 2 squares are both set to 0.
The Arrangement Loop can be turned/off by clicking the ‘loop switch’ icon, located in between the’ Punch In’ and ‘Punch Out’ switches.
The Scrub Tool Has No Launch Quantization!
This solution is a little more obscure, but if you’ve read this far and still haven’t found a solution, maybe this is the solution you’re looking for 🙂
If you’re using the arrangement scrub tool to select the playback position (from places which aren’t the beginning of a bar) while playing also playing clips in the session view,
this can actually cause clips to play out of time with the arrangement.
- The reason this happens is due to the following combinations:
- If you already have a clip set to play (play button is green) and you start playback from a location which isn’t the beginning of a bar – using the scrub tool
As the Scrub Tool has no launch Quantization, it will immediately start playback at the point which you click it…
But the clip itself will always start playback its own start point, so this combination can cause the clip to sound like it wasn’t launched in time.
The way around this is to only start playback of a clip after you have started playing the arrangement using the scrub tool.
As clips do have Launch Quantization, they will use this to start playing back at the right time.
Final Thoughts…
Due to Ableton Live’s deep functionality, clips not launching in time is a problem with a number of different possible causes,
It’s important that you’re able to figure this out for yourself, or you could look like a bit of a ‘noob’ in front of other music producers or performers.
So we hope that one of the solutions in this article has helped you to fix it for you.
If you would like to build your own MIDI script to launching Clips using any MIDI Keyboard or Controller (without needing to write code), check out our awesome MIDI mapping software: Control Surface Studio. With it, you will be able to easily build your ideal Ableton integration for any MIDI gear.
Or for more helpful articles on using Ableton Live, check out our blog.