No products in the basket.
Being able to start and stop playback from one button on your midi controller is a great space saving trick…
Let’s see how this can easily be done with a Control Surface Studio midi remote script.
There are a couple of ways that this can be done. You can use the play and stop mapping types or a Reaction.
I’ll explain both methods below…
Method 1: Using the Play & Stop mapping types

This is the most simple method but note that it requires that your midi controller button is set to ‘toggle’ which means it will alternate between sending an ‘on’ MIDI velocity value (i.e. 127) with the first press, then a MIDI ‘off’ velocity value (i.e. 0) with the second press.
This is different to a ‘momentary’ button, which will send the ‘on’ value when you press the button down, then ‘off’ when you release it.
If you are using a momentary button, either change it to a toggle via the midi controller’s own editor or , if you don’t want to change it, use method 2 instead.
(Note: If you leave it as a momentary button and use this method then playback will start when you press the button down, and stop when you release it).
Add both a ‘play’ and ‘stop’ mapping type to your CSS script.
In the settings form for each mapping, select the same button for the ‘controller input’ option.

We are now going to configure the ‘play’ mapping so it only fires when the button’s ‘On’ velocity value is sent, and the ‘stop’ mapping to only fire when the button’s ‘Off’ velocity value is sent.
Here’s how to do it…
In your ‘play’ mapping, change the ‘Control Override’ option to custom, set ‘Control Type’ to ‘On/Off’. Make sure the ‘On’ value is set to the velocity value which the physical button on the midi controller sends when you press it down
(Use the MIDI learn panel in the bottom right corner of the CSS app (script editor) to see the MIDI velocity being sent by the button when you press it)
For the ‘Off’ value, set it to any value other than the on or off velocity values which the button sends.
Doing this makes the play mapping ignore the ‘off’ velocity value.
The settings should look something like this:

Moving on to the the ‘stop’ mapping, do the same as above (change the ‘control’ option to custom, set ‘control type’ to on/off), but this time, you’re going to set the ‘On’ value to use the button’s off velocity value (this is usually ‘0’).
Then set the ‘on’ value to any velocity value other than what the button sends (so probably anything other than ‘127’ or ‘0’).
This tells the ‘stop’ mapping to fire when it receives a velocity value of ‘0’ from the button, essentially reversing your button’s functionality for this 1 mapping only.
Your ‘stop’ mapping should look like this.
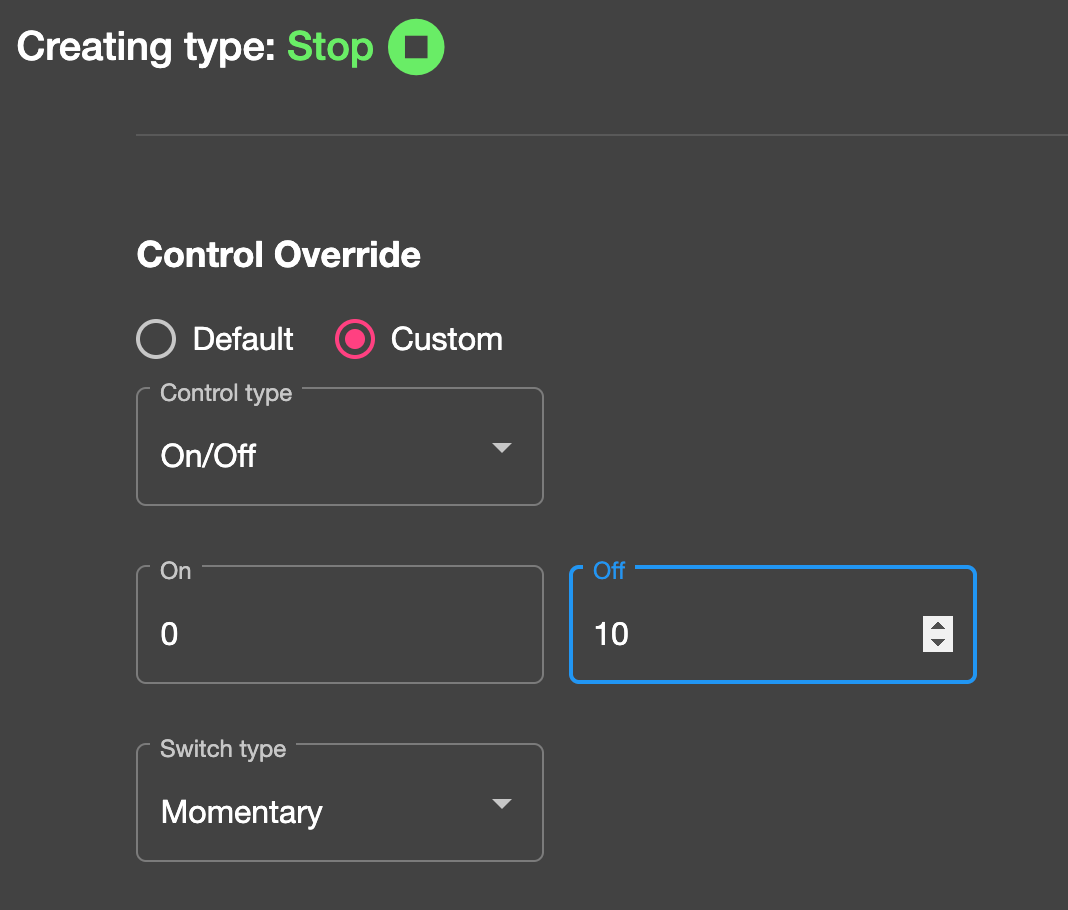
As the ‘off’ value will never be used, the ‘Switch type’ setting doesn’t matter.
And that’s it, if you generate your script into Ableton Live, you should now have a single button which alternates between start and stop playback.
Method 2: Using a Reaction to alternate between Start & Stop
Reactions are a lot more flexible, allowing you to use momentary or toggle type buttons to achieve similar functionality as in method 1.
This time rather than tying the ‘play’ and ‘stop’ functionality to the button’s on/off values,
we will be creating some basic functionality which uses the current status of the playback in your Ableton session at the moment that you press the button:
1. If playback is active then stop playback
Or
2. If playback is stopped then start playback.
This logic will alternate between play and stop on each press of your button, regardless of the MIDI velocity being sent.
Add a new ‘Reaction’ mapping type to your script and set the listener to the button which you want to use:

This Reaction will now fire whenever you press your selected button.
Scroll down to the first Action block’s ‘Condition’ section and add a condition which checks if the song is currently playing.
Live Object Model > Song > is playing
‘Is equal to’
‘True’

Then in the Action section,
Select the action to stop playback.
Live Object Model > Song > stop playing
Then add a second action below it which will exit the Reaction at this point.
Script > Exit Reaction Here
So far you have a Reaction which contains the following functionality:
When ‘button 1’ is pressed, check if playback is playing, if it is, stop playback and exit the Reaction at this point.
That covers the functionality for ‘stop playback if it is playing’,
so now we just need to do the reverse: ‘start playback if it is stopped’.
Duplicate the first Action block:

You will now have 2 Action Blocks in your Reaction, scroll down to the second Action block.
In it’s ‘Condition’ section, change the right menu from ‘True’ to ‘False’

Then in the Action section, delete both of the Actions currently in there and add the Action:
Live Object Model > Song > start playing
And that’s it! now you just need to click save and generate the script into Ableton Live.
The completed Reaction now has the following functionality:
When ‘button 1’ is pressed, check if playback is playing,
> if it is, stop playback and exit the Reaction at this point.
> if it isn’t, start playback.
I have attached the complete script json file below, this contains examples of both methods described in this tutorial. Import it into Control Surface Studio, open it in the script editor, attach your controller template then assign your button to the mappings.
*Edit: Regarding Momentary Buttons
If your button is configured in the hardware as ‘momentary’ meaning it sends an ‘on’ velocity value when you press it and an ‘off’ velocity value (usually zero) when you release it, then you’ll need to add an extra condition in each action block of the reaction to check that the latest velocity value sent by the button is greater than 0.
This prevents the actions from also firing when you release the button.

Bonus: Continue playing from where you stopped
If you would prefer that playback continues from where it stopped rather than reseting back to the beginning, you can use the ‘continue playing’ option rather than ‘start playing’ in the second Action Block.
(Live Object Model > Song > Continue playing)